Creating high-quality molds for concrete and culture stone projects requires precision, the right materials, and proven techniques. A100:B2 tin-cure silicone rubber stands out as a premier choice for this demanding application. This guide provides a comprehensive, step-by-step process to help you achieve professional, durable molds capable of capturing the finest textures and details of your original models.
1. Introduction to A100:B2 Silicone for Mold Making
A100:B2 is a two-part, condensation-cure (tin-cure) liquid silicone. It is specifically engineered for crafting molds used in reproducing concrete, cement, and artificial stone products. Its key advantages include excellent flow characteristics for capturing intricate details, high tear resistance to withstand the weight and abrasion of cementitious materials, and a low shrinkage rate (typically under 0.2%) to ensure dimensional accuracy in your casts. When mixed in the standard 100A:2B weight ratio, it cures at room temperature into a flexible yet tough rubber, making complex demolding effortless.
2. Essential Materials and Workspace Preparation
Materials Needed:
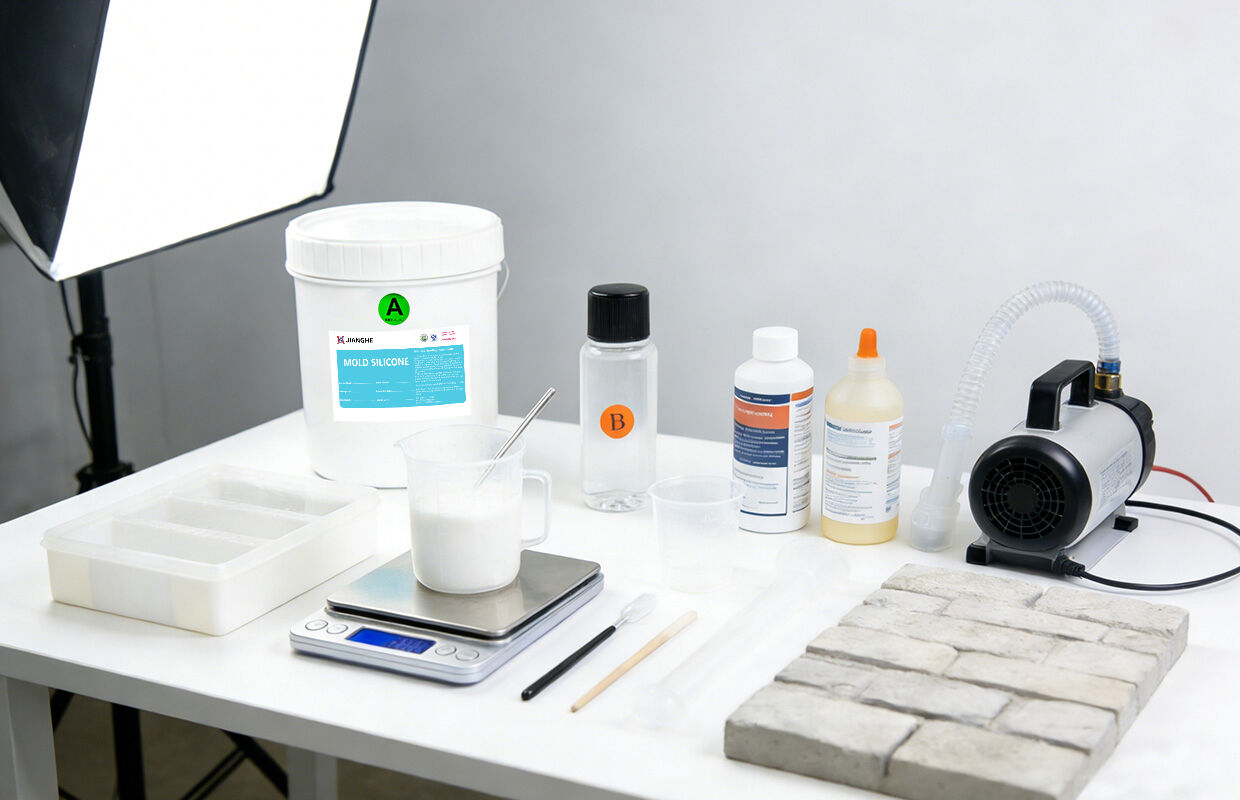
All Materials And Tools Required For Mold Making
Workspace Setup:
Choose a clean, level, and well-ventilated area. Cover your work surface with a disposable plastic sheet. Securely attach your model to the base of the mold box using a strong adhesive like hot glue or clay. Ensure all seams of the mold box are sealed to prevent silicone leakage.
3. Step-by-Step Mold Making Process
Step 1: Master Model Preparation
The success of your mold begins with the master. The concrete or stone model must be completely dry, clean, and free of dust. Apply a high-quality release agent generously and evenly over every surface of the model that will contact the silicone. A second thin coat after the first dries can guarantee a clean release. This step prevents the silicone from mechanically locking onto the porous surface.
Step 2: Accurate Weighing and Mixing
Accurate ratio is non-negotiable. Weigh Part A (the base silicone) in your mixing cup. Then, add Part B (the curing agent) at a precise 2% by weight (e.g., 100g A + 2g B). Mix thoroughly for at least 3-5 minutes, scraping the sides and bottom of the cup repeatedly. Incomplete mixing will result in uncured, sticky spots in your final mold, rendering it useless.
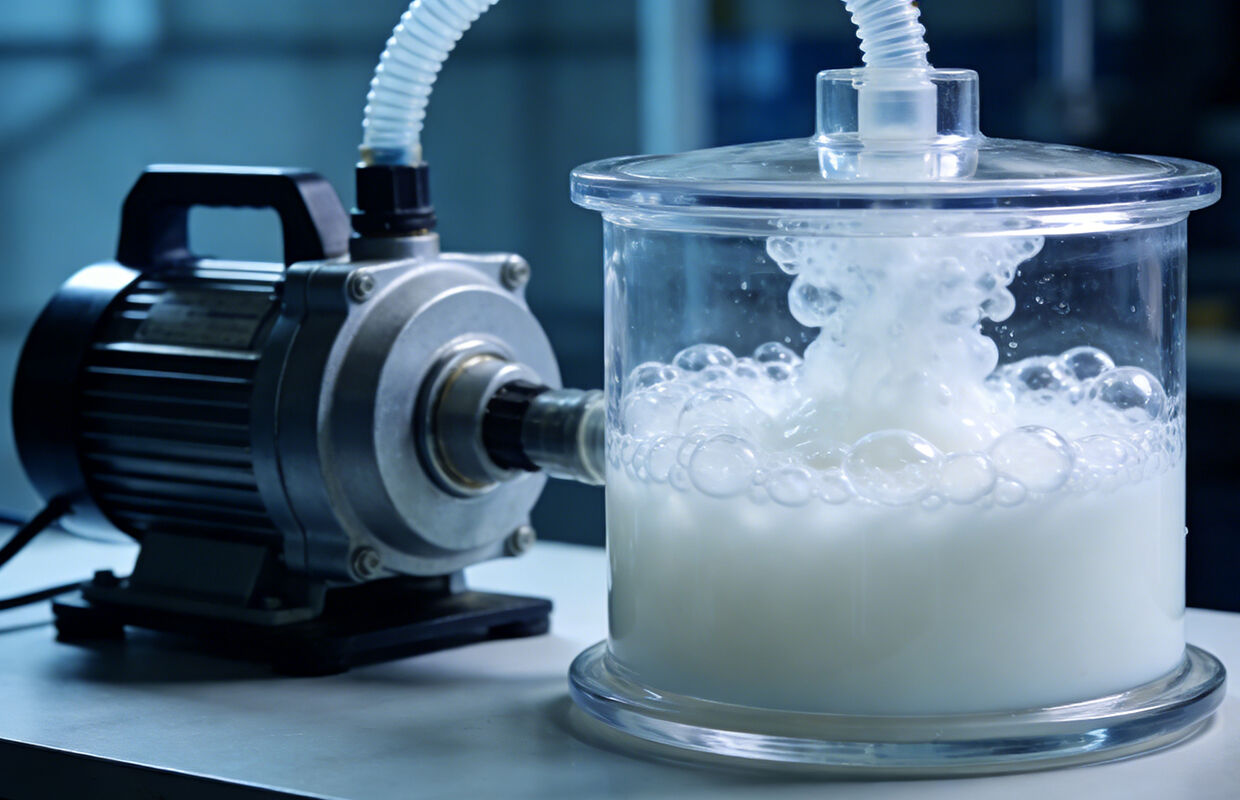
Step 3: Degassing (Vacuum Chamber)
Pour the mixed silicone into a larger, dedicated vacuum chamber container (filled no more than halfway). Place it in the vacuum chamber and start the pump. Bubbles will vigorously rise and expand to the surface. Maintain a vacuum (typically around 29 inHg) until the bubble foam collapses and the surface is mostly smooth, usually 3-5 minutes. Do not exceed 10 minutes, as this can prematurely initiate curing. Release the vacuum slowly.
Step 4: Pouring the Silicone
Remove the degassed silicone from the chamber. Pour it slowly in a thin, steady stream from one corner of the mold box, allowing it to flow naturally over and around the model. This technique helps minimize the reintroduction of air. Pour until the silicone level is at least 1-2 cm above the highest point of your model. Gently tap or vibrate the mold box to help any remaining micro-bubbles rise.
Step 5: Curing and Demolding
Let the mold cure undisturbed at room temperature (20-25°C / 68-77°F is ideal). The surface may become touch-dry in 4-8 hours, but for full internal curing and optimal physical properties, allow a full 24 hours before demolding. Do not apply heat to accelerate curing. Once fully cured, carefully dismantle the mold box and gently peel the flexible silicone mold away from the master model. The mold is now ready for use.
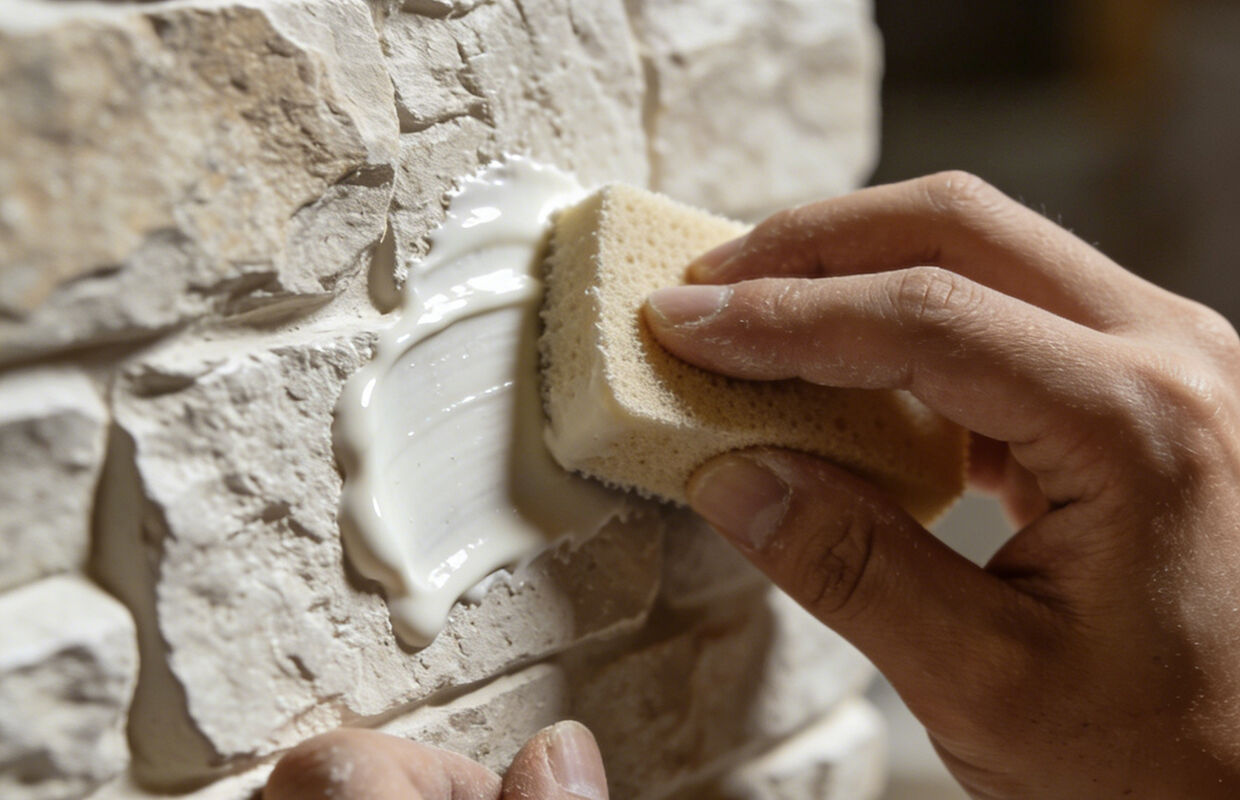
4. Maximizing Mold Lifespan with a Mother Mold (Recommended)
For casting heavy materials like concrete, a flexible silicone mold alone can distort over time. Creating a rigid "mother mold" or shell mold is highly recommended for support.
1. Once your silicone mold is cured, you can build this shell directly around it.
2. Common materials include plaster bandages, fiberglass resin with mat, or urethane casting resin.
3. Apply the rigid material in layers over the back of the silicone mold, ensuring it is thick enough (usually 1-2 cm) to be completely rigid.
4. This shell will hold the silicone's shape perfectly, dramatically increasing the number of casts you can achieve from a single mold.
5. Troubleshooting Common Issues
By meticulously following this guide, you can reliably produce professional-grade silicone molds with A100:B2 that are perfectly suited for the rigors of concrete and culture stone casting. The result will be a durable tool that faithfully reproduces your designs for many cycles to come.
 Hot News
2026-01-14
2026-01-06
2025-12-27
2025-12-26
2025-12-26
2025-12-25
Shenzhen Jianghe New Materials Technology offers top-quality Epoxy AB Glue, PU Resin, UV Resin, and Liquid Silicone Rubber. With ISO-certified production, global certifications, and customizable solutions, we serve manufacturers and Amazon sellers worldwide.
Room 1008, Building 1, Cofco Yunjing, Martin Street, Heshui Kou Community, Guangming
Copyright © 2026 Shenzhen Jianghe New Materials Technology Co., Ltd.All rights reserved. Privacy Policy