Room 1008, Building 1, Cofco Yunjing, Martin Street, Heshui Kou Community, Guangming +86-13418798686 [email protected]
Introduction: Beyond Simple Pigmentation
In the world of resin art, color is often mistaken as a mere surface attribute. Beginners see it as a way to make clear liquid look red, blue, or green. However, for professional resin artists, industrial designers, and DIY experts, color is a three-dimensional medium. It is a tool to sculpt depth, manipulate light, and create ethereal movements within a solidified block of polymer.
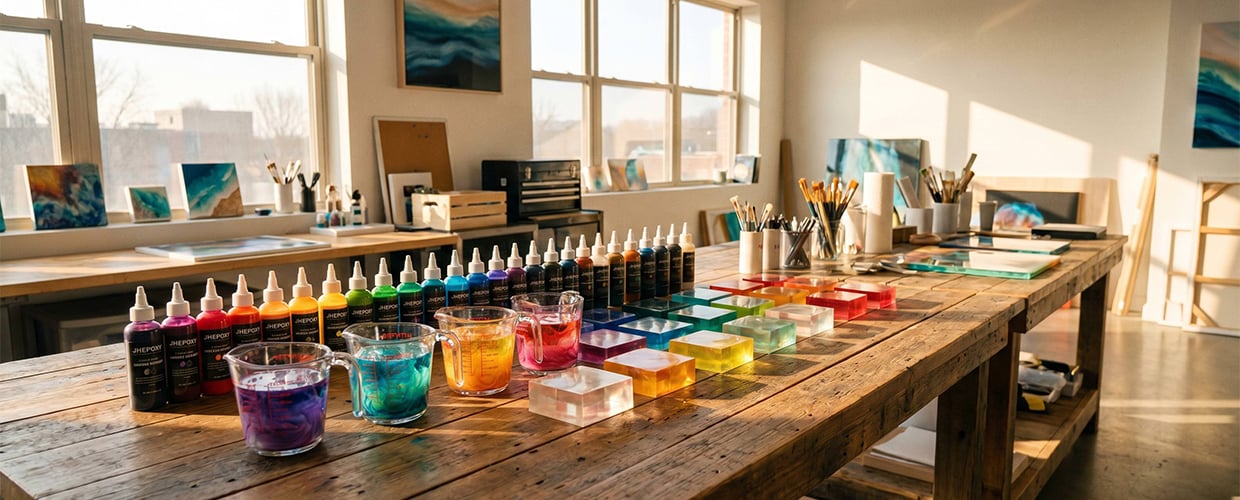
The secret to transitioning from "craft" to "fine art" lies in the mastery of high-concentration liquid pigments. Unlike standard craft-store dyes, professional solutions like JHEPoxy High-Concentration Liquid Pigment offer a unique set of physical properties that allow for unprecedented control over translucency and depth. This article explores the technical logic behind these pigments and provides a masterclass on creating 3D color layers through advanced application techniques.
1. The Physics of Instant Diffusion: Why Concentration Matters
The most striking feature of a high-concentration dye is its Instant Diffusion capability. To understand this, we must look at the fluid dynamics within the resin mixture. When a single drop of JHEPoxy pigment hits the surface of a low-viscosity resin, it doesn't just sit there; it undergoes a rapid "bloom" effect.
This happens because high-concentration pigments are formulated with a specific carrier fluid that has a lower surface tension than the epoxy resin itself. As the drop enters the resin, the difference in surface tension pulls the pigment particles outward in a fractal-like pattern. In technical terms, this is an application of the Marangoni effect. For the artist, this means you can achieve hyper-delicate "smoke" effects or sharp "vines" of color without mechanical stirring, which often introduces unwanted micro-bubbles and destroys the natural flow of the medium.
Key Technical Tip: To maximize instant diffusion, ensure your base resin is at an optimal temperature (around 25°C-30°C). Higher temperatures lower the viscosity further, allowing the high-concentration dye to travel faster and create more intricate, hair-like patterns.
2. The Logic of Translucency and Optical Depth
"Depth" in resin is an optical illusion created by the interplay of light transmission and internal reflection. When using standard pigments, adding too much often leads to an "opaque wall"—the light hits the surface and bounces back immediately, making the piece look flat and plastic.
The magic of High-Concentration Resin Pigment is its ability to maintain translucency even at high saturation levels. This allows light to penetrate deep into the casting, hit the bottom or internal layers, and refract back through the colored medium. This creates a "glow from within" effect that is essential for high-end river tables or crystalline sculptures.
To master this, you must think in terms of the "Opacity Gradient." By diluting the high-concentration dye in varying ratios across different batches of resin, you can control exactly how far light travels before it is absorbed.
3. Master Technique: 3D Color Layering (The "Suspended Reality" Effect)
The most advanced application of these pigments is Color Layering. This technique involves pouring resin in multiple stages to create a literal 3D environment within the piece.
The Process:
By repeating this process, you create distinct "Z-axis" coordinates for your color. When viewed from above, these layers overlap, but because of the high translucency of the pigment, you can see "through" the top colors into the bottom ones, creating a 3D depth that is impossible to achieve in a single pour.
4. Blurring and Gradients: The Role of Low-Viscosity Resin
One of the hardest things to achieve in resin art is a perfect, seamless gradient. In high-viscosity resins, pigments tend to stay exactly where you put them, leading to "harsh lines" that look amateur.
The synergy between JHEPoxy High-Concentration Dye and low-viscosity resin is the secret to the "Blurring" effect. Low-viscosity resin allows the pigment particles to remain in motion for a longer period before the cross-linking (curing) process locks them in place.
As the resin undergoes its exothermic reaction, internal convection currents (Bénard cells) naturally move the pigment. Because the pigment is so concentrated, even the slightest movement creates a massive visual shift. This produces "soft-focus" edges and natural gradients that mimic the behavior of deep-sea water or atmospheric nebulae.
5. Troubleshooting: Avoiding Common Pitfalls
While high-concentration pigments offer immense power, they require precision:
Conclusion: Elevating the Craft to Fine Art
The transition from a hobbyist to a professional resin artist is marked by a shift in perspective: seeing color as a structural element rather than a surface finish. By leveraging the Instant Diffusion and Layering Techniques enabled by high-concentration pigments, you are no longer just making a "colored object." You are capturing a moment of fluid motion and freezing it in time.
Whether you are designing a sleek industrial component or a large-scale artistic installation, the depth and translucency provided by this technical approach will ensure your work stands out in a crowded market. Mas
 Hot News
Factory-backed material solutions for manufacturers, brands and distributors worldwide. We specialize in liquid silicone rubber, epoxy resin, flooring materials and related products, providing reliable manufacturing, OEM customization and stable global supply.
Copyright © 2026 Shenzhen Jianghe New Materials Technology Co., Ltd.All rights reserved. Privacy Policy
 EN
EN